Scratch Building Structures from Wood
One of the most rewarding aspects of model railroading is creating structures that cannot be purchased in a hobby store. Whether it is a rural goods shed, a small station, a warehouse or an industrial building, scratch building allows you to create exactly the structure your layout needs.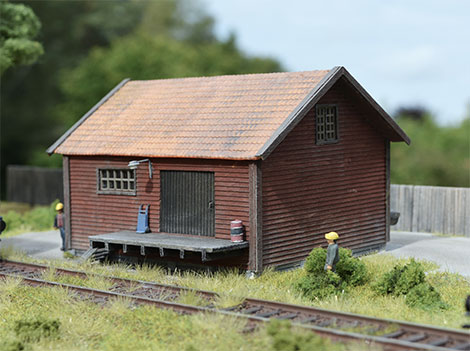
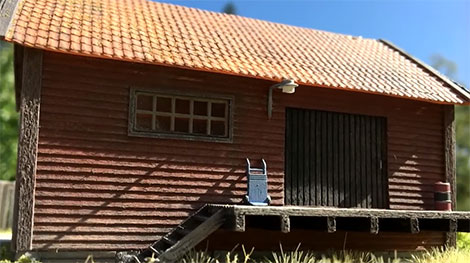
Final result of the scratch built goods shed
Whether it is a rural goods shed, a small station, a warehouse or an industrial building, scratch building allows you to create exactly the structure your layout needs.
While plastic kits dominate today's market, wood remains one of the most versatile and realistic building materials available. Pre-engraved wooden sheets already contain plank patterns and wood grain, making it possible to create highly convincing structures with relatively simple tools.
Start with a Drawing
Every successful scratch-building project begins with a drawing. This does not need to be a detailed CAD model. A simple sketch based on a prototype drawing, photograph or your own idea is often sufficient.
Before cutting any material, it is a good idea to build a quick mock-up from paper, cardboard or styrofoam. This allows you to evaluate the building's size and proportions within the scenery. If the structure appears too large or too small, adjustments can easily be made before construction begins.
When modeling a specific prototype, dimensions should normally be converted directly to scale. For freelance structures, however, visual appearance is often more important than exact dimensions.
Cutting the Walls
The walls are typically cut from pre-engraved wooden sheets using a steel ruler and a sharp hobby knife. Multiple light cuts usually produce cleaner results than attempting to cut through the material in a single pass.
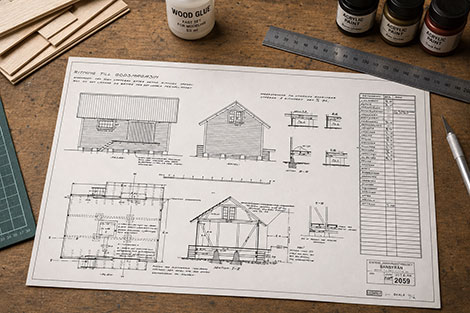
I downloaded the drawing from the Railway open archive
Openings for windows and doors should not be cut immediately. Instead, construct or select the windows first and use them as templates. This approach ensures a perfect fit and avoids gaps that can be difficult to hide later.
Windows and Doors
Windows can be purchased as commercial castings or salvaged from leftover kits. Transparent plastic packaging often provides excellent glazing material. After assembling the window frames, sand the edges carefully until the frame and glazing are perfectly flush. This greatly simplifies installation later. Doors can be built from plain wood sheet, styrene or leftover wall material. Sliding freight doors are often mounted slightly recessed into the wall, adding depth and realism.
Preparing the Walls
Before assembly, the edges of the walls should be sanded to approximately 45 degrees. This creates clean corner joints and reduces visible seams. A simple guide block with a perfectly square edge makes this task much easier. Accuracy is more important than speed. Well-prepared corners contribute greatly to the final appearance of the structure.
Painting Wood Structures
One advantage of wood is that the material itself contributes to the weathering effect. Begin with a thin black or dark brown wash made from acrylic paint diluted with water and isopropyl alcohol.
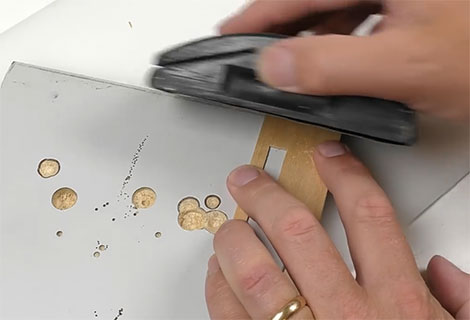
Sanding the wall segments 45 degree before painting
This penetrates the wood grain and enhances the natural texture. After the wash has dried, apply the final wall color. For many older freight sheds and industrial buildings, a faded red-brown color works particularly well. Slightly darker tones under the roof eaves can simulate areas that have been protected from sun and weather. Because the wood grain remains visible through the paint, the structure immediately gains a realistic appearance.
Constructing the Floor
The floor can be built from the same type of engraved wood sheet used for the walls. Before installation, weather the floor using washes or dry brushing techniques. Support beams beneath the floor can be made from balsa wood strips. Regular spacing creates a realistic structural appearance and also strengthens the model. Once the floor is complete, assembly of the building can begin.
Assembly
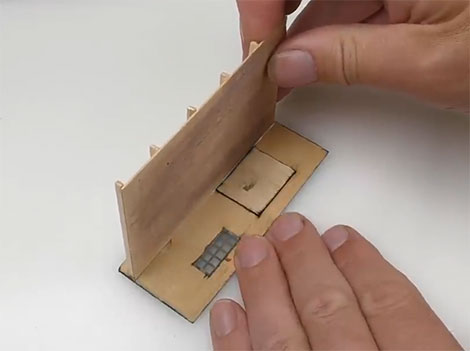
A practical method is to glue the floor to one wall first and then add the remaining walls one at a time. Wood glue provides strong joints and allows time for adjustments before curing. Windows and doors should be installed before final assembly whenever possible. Loading docks, stairways and trim pieces can then be added. These details often determine whether the finished structure appears realistic or toy-like.
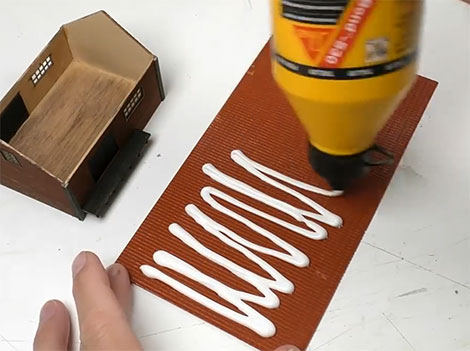
Molded Realistic Tiled Roof
The roof is one of the most visible parts of any structure. Commercial plastic roofing sheets provide excellent texture but can sometimes appear too thick in scale. One solution is to create a thin roofing layer by making a glue casting from the roofing sheet and attaching it to a thinner wood substrate. Tile roofs can be painted using orange, brown and gray tones. Subtle color variation immediately makes the roof look older and more realistic. Roof trim and ridge details should be added before weathering.
Lighting and Small Details
Simple details greatly increase realism.
Exterior lamps, drainpipes, loading dock equipment, oil barrels and signs help tell the story of the building. Adding interior or exterior lighting is easier than many modelers believe. Small LEDs hidden inside lamp castings can create impressive results, especially when viewed during evening operating sessions.
Weathering
Weathering transforms a newly built structure into a believable building. Begin by adding gray tones to roofs and areas exposed to weather. Dry brushing lighter colors highlights edges and raised details. Wooden walls benefit from subtle fading and streaking. Areas near doors and loading docks often show the heaviest wear. Less is usually more. Multiple light weathering layers generally produce better results than a single heavy application.
Installing the Structure
The final step is integrating the building into the scenery. Many structures require a slightly raised foundation or loading platform. Plaster, putty or styrene can be used to create the necessary terrain adjustments. Blend the edges into the surrounding scenery using gravel, static grass, weeds and bushes. Small scenic details such as crates, barrels and figures help connect the building to its environment. A well-integrated structure becomes part of the story of the railroad rather than simply another model sitting on the layout.
Conclusion
Scratch building with wood remains one of the most satisfying techniques in model railroading. The materials are inexpensive, easy to work with and capable of producing exceptionally realistic results. By starting with a simple drawing, carefully preparing the walls, using layered paint techniques and adding subtle weathering, it is possible to create unique structures that perfectly fit your railroad and could never be found in a commercial kit.
// Martin alias 'Marklinofsweden'